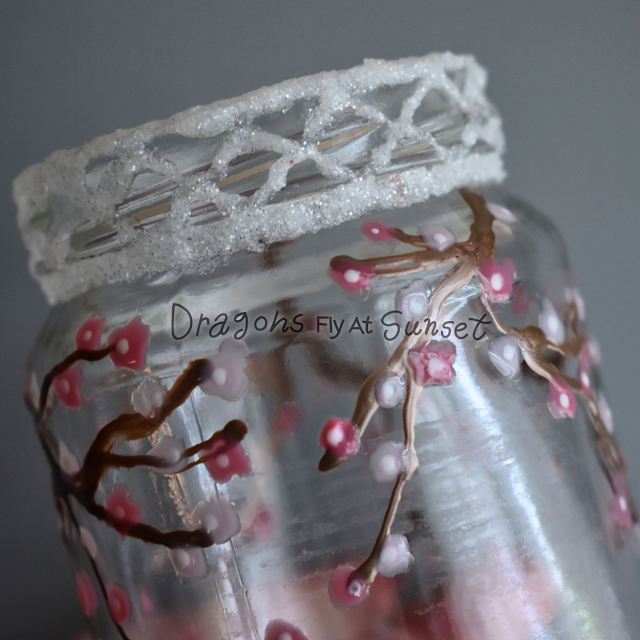
Cherry Blossom Jar
This week I’m sharing something a bit different to my usual projects – a jar decorated using nuvo drops. My inspiration for this project came from a tutorial video shared by Ruth Hamilton (the video in question can be found here) showing how to use Nuvo Drops to decorate a jar as a Christmas decoration. I really liked the design of the jar she created but since this particular jar is used to hold my glue bottle and will be out all year round, I decided to choose a different theme. The design I chose is inspired by the pink flowers of cherry blossom trees.
[Image ID] A jar decorated with Nuvo drop cherry blossom branches. There is grass at the bottom of the jar and a glittery lattice pattern round the rim. [description end]
‘Nuvo Drops’ come in a bottle and are in a thick paint-like consistency so they can be squeezed out to create raised details. Normally, they’re intended to be used to create little circular dots – hence the name ‘drops’ – on cards, but they can also be used on other surfaces. Most Nuvo Drops have a glossy finish but they come in a variety of other finishes such as metallic and stone (textured). I used a mix of different finishes on this jar as I simply used whatever I had that was the right colour.
[Image ID] Close up of the branch design before the blossom has been added. [description end]
I worked on the jar over several days as I needed to let each layer dry (to the touch, at least) before I applied the next so I could ensure the colours didn’t mix. The drops are usually touch-dry within an hour, but take 24-48 hours to fully dry out. I mostly didn’t wait the full 24-48 hours between layers as once the surface was dry the risk of colour mixing had also disappeared. The first layer (as pictured above) consisted of using a brown to draw in the shape of the branch. I didn’t use any special tools for this project, and made all the designs using only the default tip of the Nuvo Drop bottle. I drew three different branch shapes around the jar so that the designs filled most of the upper half of the jar.
After the branch, I chose a pink and a lilac drop to create blobs which would become the flowers. I tried to have an even mix of both colours but I didn’t count them. I found it was much more efficient to apply one colour to the branch, and leave spaces to add the other afterwards, than to constantly switch bottles. The two colours were applied as a single layer, rather than waiting for one to dry first, because the colours would not be touching and thus couldn’t mix.
[Image ID] Close up of the blossom with their white centres added. [description end]
Once the flower blobs were dry enough I added a little white drop to the centre of each to make them look more like flowers.
[Image ID] Close up of the lattice pattern at the top so the glitter effect can be clearly seen. [description end]
Now that the branches were complete I moved on to finishing the rest of the jar. I used some ‘Glitter accents’ to create this lattice pattern over where the grooves for the lid were. ‘Glitter Accents’ are similar to Nuvo Drops but much thicker and more sparkly such that they look like a 3D glitter glue.
[Image ID] Close up showing the two greens used to create the grass effect. [description end]
The final part of decorating the jar was the grass. I used stone drops to create a base line round the bottom of the jar, and then flicked some metallic green upwards to look like blades of grass. I chose to use both greens as I thought the textured effect from the stone drops would help to ‘ground’ the grass so it didn’t look like it was floating.
-
Nuvo Drops by Tonic Studios in the following colours:
Branches: Metallic crystal drops in ‘Dirty Bronze’
Blossoms: Gloss crystal drops in ‘Sweet Lilac’ and ‘Carnation Pink’
Blossom centres: Vintage drops in ‘Chalk Stick’
Grass (lower layer): Stone drops in ‘Crushed Aloe’
Grass (upper layer): Metallic crystal drops in ‘Bottle Green’
White lattice: Glitter Accents in ‘Fresh Snowfall’
-
Artwork & Photography ©Dragonsflyatsunset 2023, all rights reserved.


